Preserving movies with a Raspberry Pi

Kinograph: preserving 1920s movies with a Raspberry Pi

3 comments Tags: 3 hours agoby liz

submit to reddit

A great motivator for us in developing the Raspberry Pi was bringing down the cost of computing. Nobody should be excluded from being able to learn about computing, or from using it for work or pleasure, by what’s in their pocket.

The pricing of electronics means that some important and useful tools have historically been outside the reach of anyone without a large chunk of capital behind them. You’ll have seen the photography hacks we feature here, which use a Pi to make very, very inexpensive versions of photography equipment like time-lapse rigs, gigapixel rigs, water droplet setups and the like. Off-the-shelf versions of equipment like this can cost thousands of pounds, but a Pi and some ingenuity can bring the cost right down to levels which are sensible and affordable. These projects are not just for amateurs: we have seen professional photographers using Pi-based, home-hacked equipment in preference to the expensive stuff. It works just the same, and there’s a lot to be said for the warm glow you get from making your work tools yourself.

It’s not just individuals and small businesses who are sometimes priced out of doing worthwhile stuff by the price of electronics. Libraries, museums and other public institutions are often priced out of being able to digitise collections by the prohibitive cost of equipment.

Isolating audio

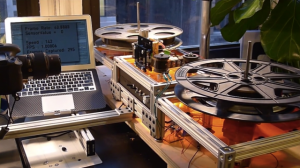
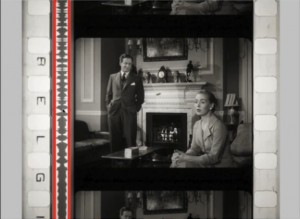
Kinograph is an astonishing thesis project from Matthew Epler, an artist and film historian. It’s a Pi-powered, open-source, scalable device for digitising old film stock, complete with the ability to stabilise images (another application for OpenCV) and recapture sound. A good DSLR camera is the most expensive part of the setup, at about $2000; the rest of the equipment comes to $1200. (Matthew is working on getting that figure down below the magic $1000.) Compare that to the $480,000 it would cost you to digitise 50 films on reels at a film lab, or the $175,000 it’d cost you to buy a Kinetta (the nearest commercial equivalent device) and a whole world of possibilities opens up. Film stock, be it celluloid, acetate or nitrate based, is not stable, and being able to record and save our film heritage is a pressing concern. We’ve already lost more than 90% of all silent movies, and around 50% of the films with audio made before 1950.

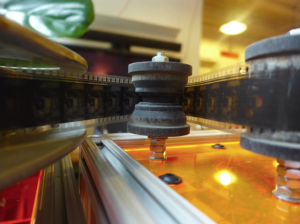
Kinograph at work – note the 3D printed rollers

I have what could probably be called a bit of an old movie problem; my bedroom wall has framed pictures of pre-talkies Norma Shearer, Lupe Velez and Anna May Wong, like the bedroom of a teenager who’s been time-shifted 90 years. I howl with frustration at poor Eben, who has to share that bedroom, when I read the synopses of pre-code movies I’d give my right arm to see, which have gone forever. We’ve got shelves of books on silent movies, along with boxes of DVDs and old fan magazines. That the Raspberry Pi is a part of this project makes me unspeakably proud.

Here’s a two and a half minute video about the technology.

Matthew is working to iron out a few remaining bugs and to bring the cost down further. He expects to be posting the materials, instructions, and code online at the end of July. Watch this space!

Fonte: Raspberry PI .org

Modificare le immagini con ImageMagick

Informazioni sull’ immagine

Per ottenere le informazioni relative alle dimensioni dell’immagine

identify [nome del file]

Si sa che dall’avvento delle fotocamere digitali tutti noi siamo diventati dei provetti fotografi e per dimostrare ciò non manca mai l’occasione per scattare decine e decine di fotografie “Tanto poi se non mi piacciono le cancello!”. Ci si ritrova così con il computer pieno zeppo di fotografie, magari ad alta risoluzione, che occupano molto spazio.

Grazie alla crescente popolarità dei Social Network tipo Facebook o MySpace è prassi condividere le proprie fotografie con parenti e amici. Per agevolare il caricamento delle fotografie sul web è opportuno ridimensionarle in modo da renderle più leggere e facilmente gestibili.

Prassi normale

Ok, ma come faccio per modificare le immagini?
Normalmente apro un programma di fotoritocco tipo PhotoShop o l’ottimo GIMP e ridimensiono le immagini una alla volta. Questo metodo va benissimo, ma cosa succede se ho 50, 100 o anche più fotografie? Sicuramente impiegherei non meno di qualche ora per terminare il compito.

Un metodo più veloce

Siccome di natura sono un po’ pigro, la soluzione che adotto normalmente è l’utilizzo della suite ImageMagick che è una serie di tool a riga di comando, disponibile per tutte le distribuzioni GNU/Linux, Windows e Mac OS X. Per l’installazione su GNU/Linux utilizzate il vostro gestore di pacchetti preferito (apt-get, Synaptic, YaST…) mentre per installarlo su Windows o Mac OS X il sito da cui scaricarlo è http://www.imagemagick.org.

Vediamo ora due dei comandi maggiormente utilizzati, ovvero convert e mogrify.

Convert

Questo comando “converte” l’immagine di partenza e salva le modifiche in un nuovo file; l’immagine originale non viene alterata.

Ad esempio, per ridimensionare l’immagine originale.jpg da 2560×1920 pixel a 1000 pixel di larghezza mantenendo le proporzioni e salvarla nel nuovo file modificata.jpg digitate nel terminale:

convert -geometry 1000x originale.jpg modificata.jpg

nel giro di uno o due secondi l’immagine è modificata e salvata. Semplice vero?

Per ridimensionare 100 immagini a 1000 pixel di larghezza presenti nella cartella di lavoro basta digitare nel terminale (tutto in una sola riga, mi raccomando):

for i in *.jpg; do convert -geometry 1000x $i thumb-$i; done

ovviamente questo comando funziona anche con le percentuali, ma in questo caso bisogna usare l’opzione -scale al posto di -geometry:

for i in *.jpg; do convert -scale 50% $i thumb-$i; done

Il comando convert permette di convertire immagini in diversi formati, ad esempio per convertire originale.jpg in orginale.png:

convert originale.jpg originale.png

Mogrify

Il comando mogrify agisce sostanzialmente come convert con l’importante differenza che sovrascrive l’immagine originale. Se si desidera mantenere una copia dell’immagine originale è opportuno effettuare un backup.

I comandi precedenti possono essere riscritti nel seguente modo:

mogrify -geometry 1000x originale.jpg

Il comando seguente ridimensiona tutte le immagini con estensione .jpg presenti nella cartella:

mogrify -geometry 1000x *.jpg

oppure

mogrify -scale 50% *.jpg

Comodo vero?
Bene, per questa volta abbiamo terminato ma torneremo presto sull’argomento ImageMagick perchè utilizzato in uno script Bash ci permette di ottenere dei risultati interessanti.